In the culinary world, precision can often be the secret ingredient that elevates a good dish to a great one. Whether you’re a seasoned chef or a home baking enthusiast, encountering a recipe that calls for “1/3 cup” of an ingredient is a common occurrence. While seemingly straightforward, accurately measuring this specific quantity, especially when a dedicated 1/3 measuring cup isn’t immediately at hand, can sometimes feel like a puzzle. This comprehensive guide will demystify the 1/3 cup measurement, exploring the different types of measuring cups, comparing their materials, and offering expert tips to ensure your cooking and baking are consistently perfect.
Types of Measuring Cups: Understanding Your Tools
Before diving into the specifics of measuring a 1/3 cup, it’s crucial to understand the fundamental differences between the various measuring cups available, as each is designed for optimal accuracy with specific types of ingredients.
Dry Measuring Cups
|
Our Picks for the Best Measuring Cup in 2026
As an Amazon Associate I earn from qualifying purchases.
|
||
| Num | Product | Action |
|---|---|---|
| 1 | OXO Good Grips 2-Cup Angled Measuring Cup |

|
| 2 | Amazon Basics Glass Measuring Cup, Precise 8 Cup Capacity, Clear Kitchen Measuring Tool, 2 L |
|
| 3 | Pyrex 4-Cup Glass Measuring Cup For Baking and Cooking, Dishwasher, Freezer, Microwave, and Preheated Oven Safe, Essential Kitchen Tools |
|
| 4 | Hudson Essentials Stainless Steel Measuring Cups Set (6 Piece Set) |
|
| 5 | 1/3 Cup Measuring Cup, 80ml Stainless Steel Measuring Scoop Gold Coffee Scoop 1/3 Teaspoon with Wooden Handle for Baking Cooking Wet and Dry Ingredients |
|
| 6 | Pyrex Essentials (3-Pack) Glass Measuring Cups Set, (1, 2 & 4 Cup) Measuring Cups For Prepping, Baking and Cooking, Preheated Oven, Dishwasher, Freezer, and Microwave Safe |
|
| 7 | FARBERWARE 5-Piece Measuring Cup Set with Coffee Scoop, Durable Plastic Nesting Measuring Cups with Easy-Read Markings, BPA-Free, Dishwasher Safe |
|
| 8 | 2 Pack Measuring Cup Set, Includes 250Ml (1-Cup), and 500Ml (2-Cup) Plastic Liquid Measuring Cups- Baking, Cooking, Mixing & Measuring Cups, Essential Kitchen Tools |
|
| 9 | Measuring Cups Set, Liquid Measuring Cups For 3 For Kitchen - BPA Free Plastic Set with Spout Multiple Measurement Scales (Clear) |
|
| 10 | OXO Good Grips 3-Piece Angled Measuring Cup Set |
|
Dry measuring cups are typically sold in nested sets, often including common sizes such as 1 cup, 1/2 cup, 1/3 cup, and 1/4 cup. These cups are designed to be filled to the brim and then leveled off with a straight edge, like the back of a knife or a bench scraper, to ensure an exact measurement. They are usually made from durable materials like stainless steel or plastic and come in individual, distinct cup shapes.
Liquid Measuring Cups
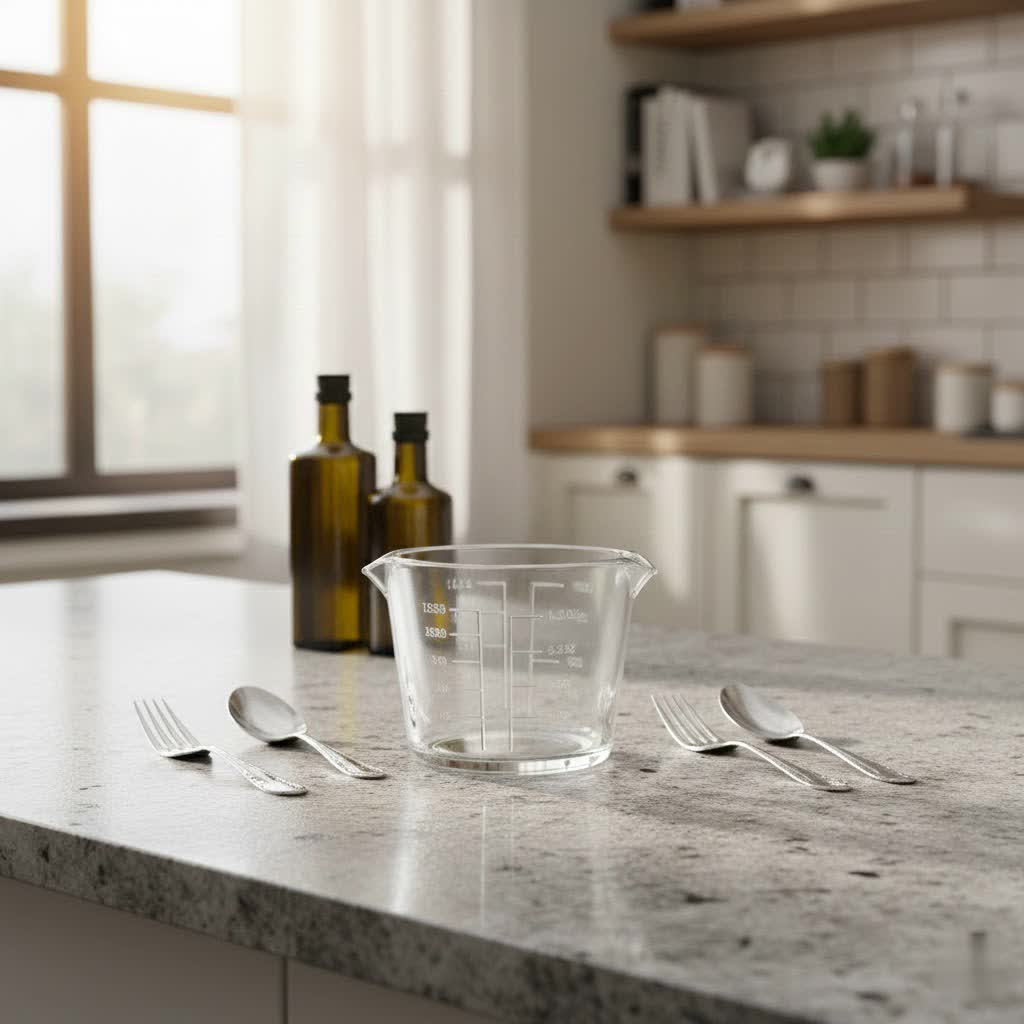
In contrast, liquid measuring cups are designed for fluids like water, milk, oils, and extracts. They typically resemble a pitcher with a handle and a pouring spout. Made from clear materials such as glass or transparent plastic, these cups feature measurement lines marked along the side. To achieve accurate liquid measurements, place the cup on a flat surface and read the liquid level at eye level, observing the bottom of the meniscus (the slight curve formed by the liquid’s surface).
Electronic Measuring Cups
For those seeking the highest level of precision and convenience, electronic measuring cups offer a modern solution. These innovative devices often combine a measuring cup with a built-in digital scale, allowing you to measure ingredients by both volume and weight simultaneously. While generally more expensive and requiring batteries, they can be incredibly useful for recipes where exact weight measurements are critical.
Decoding the 1/3 Cup: Conversions and Alternatives
The 1/3 cup is a fundamental measurement, but what exactly does it represent, and what do you do if you don’t have the right tool?
What is 1/3 Cup?
Simply put, 1/3 cup is one-third of a standard U.S. customary cup. If you imagine dividing a full cup into three equal parts, one of those parts constitutes a 1/3 cup. Understanding this basic fraction is the first step to confidently approaching any recipe.
Exact Equivalents
For those times when a dedicated 1/3 cup measure isn’t available, knowing its precise equivalents in smaller units is a lifesaver. The most common and accurate conversion is:
- 1/3 cup = 5 tablespoons + 1 teaspoon
This conversion is highly reliable for both liquid and dry ingredients, ensuring your recipe remains consistent. In terms of volume, 1/3 cup is approximately 2.67 fluid ounces or about 79 milliliters (for U.S. customary measurements).
Measuring Without a Dedicated 1/3 Cup
If your measuring cup set doesn’t include a specific 1/3 cup, or if you’ve misplaced it, there are several practical alternatives:
- Using Tablespoons and Teaspoons: As mentioned, combine five tablespoons and one teaspoon to achieve an accurate 1/3 cup. This method is precise and utilizes common kitchen tools you likely already own.
- Combining Other Cups: You can also get close by combining other standard measuring cup sizes. For instance, a 1/4 cup plus an additional tablespoon and one teaspoon will give you 1/3 cup. While slightly less direct than the 5 tablespoons + 1 teaspoon method, it’s a viable option.
- Visual Estimation: While not recommended for baking or recipes requiring high precision, for less critical dishes, you might attempt a visual estimate. This involves filling a 1/2 cup measure about two-thirds full. However, this method introduces a higher risk of inaccuracy.
Comparing Measuring Cup Materials
The material of your measuring cups significantly impacts their durability, ease of use, and overall longevity. Each material comes with its own set of advantages and disadvantages.
Glass Measuring Cups
Advantages:
- Heat-Resistant: Ideal for measuring hot liquids or melting ingredients in the microwave.
- Non-Porous: Resists absorbing odors and stains, keeping them clean and hygienic.
- Clear: Allows for easy reading of liquid levels at eye level.
- Easy to Clean: Often dishwasher safe.
Disadvantages:
- Fragile: Prone to breaking if dropped or subjected to thermal shock (rapid temperature changes).
- Markings May Fade: Over extended use and repeated washing, printed measurement lines can sometimes fade.
Plastic Measuring Cups
Advantages:
- Lightweight and Inexpensive: A budget-friendly and easy-to-handle option.
- Durable Against Drops: Less likely to shatter than glass if dropped.
- Versatile: Clear plastic versions work for liquids, opaque for dry.
Disadvantages:
- Can Stain and Absorb Odors: May become discolored or retain smells from strong ingredients over time.
- Less Heat-Resistant: Not suitable for very hot liquids or microwave use unless specifically designed for it.
- Markings May Fade: Similar to glass, plastic markings can wear off.
- Can Warp: High heat from dishwashers or hot ingredients can cause warping.
Stainless Steel Measuring Cups
Advantages:
- Highly Durable: Resistant to dents, scratches, and breakage, offering excellent longevity.
- Non-Reactive: Does not react with acidic or alkaline ingredients, preserving flavor integrity.
- Professional Aesthetic: Often preferred for their sleek, sturdy feel and appearance.
- Ideal for Dry Ingredients: Their solid construction makes them perfect for scooping and leveling.
Disadvantages:
- Opaque: Cannot see through them, making them less suitable for liquid measurements that require reading a meniscus.
- Can Be Flimsy: Cheaper sets might have thin-gauge steel or weak handles that bend under pressure.
- May Require Hand Washing: Some sets recommend hand washing to maintain finish and prevent rust on riveted handles.
| Feature | Glass | Plastic | Stainless Steel |
|---|---|---|---|
| Best For | Liquids, hot ingredients | Dry (opaque), liquids (clear) | Dry ingredients, heavy use |
| Durability | Good (but fragile) | Good (against drops) | Excellent |
| Transparency | High | Clear (for liquids), Opaque (for dry) | Opaque |
| Heat-Resistant | High | Low (can warp) | High |
| Odor/Stain | Resists | Can absorb/stain | Resists |
| Ease of Reading | Excellent (liquids) | Good (liquids, can fade) | N/A (for liquids, good for leveling dry) |
| Cost | Moderate to High | Low | Moderate to High |
Your Guide to Choosing the Right Measuring Cup
Selecting the best measuring cups for your kitchen depends on your specific needs, cooking habits, and preferences. Here’s how to make an informed decision:
Assess Your Needs
Consider what you primarily cook and bake. If you frequently work with liquids, a good set of glass or clear plastic liquid measuring cups is essential. For avid bakers who deal with large quantities of flour, sugar, and other dry ingredients, a robust stainless steel dry measuring cup set, including a 1/3 cup, will be invaluable. Also, think about the capacities you typically require; while a standard 1-cup liquid measure is versatile, larger 2-cup or 4-cup options can save time for bigger batches.
Prioritize Material
Based on the pros and cons discussed, choose a material that aligns with your priorities. If durability and professional feel are paramount, opt for stainless steel for dry ingredients and quality glass for liquids. If budget and impact resistance are key, plastic can be a good choice, particularly for dry measures.
Ensure Accuracy and Readability
Regardless of the material, always check for clear, easy-to-read measurement markings. For liquid cups, ensure the lines are distinct and easy to view at eye level. For dry cups, the individual cup sizes should be clearly embossed or etched, not just printed, to prevent fading over time. Look for designs that allow for easy leveling of dry ingredients.
Consider Brand and Reviews
Invest in measuring cups from reputable brands known for quality kitchenware. Reading user reviews can provide insights into accuracy, durability, and common issues like fading markings or flimsy handles. A trusted brand often means better manufacturing quality and adherence to accurate volume standards.
Expert Tips for Using and Maintaining Your Measuring Cups
Even with the best tools, proper technique and care are essential for consistent results and prolonged lifespan.
Accurate Measuring Techniques
- Leveling Dry Ingredients: When measuring dry ingredients like flour or sugar in a dry measuring cup, overfill the cup slightly, then use a straight edge (like the back of a knife or a flat spatula) to level off the excess. Do not pack down flour unless the recipe specifically calls for it, as this can lead to too much ingredient.
- Reading Meniscus for Liquids: For liquid measuring cups, place the cup on a flat, level surface. Bend down so your eyes are level with the desired measurement line. Read the bottom of the meniscus – the slight curve that forms on the surface of the liquid – for the most accurate measurement.
- Sticky Ingredients: For sticky ingredients like honey or syrup, lightly coat the inside of your measuring cup or spoon with cooking spray or oil before measuring. The ingredient will slide out easily, minimizing waste and making cleanup simpler.
Cleaning and Storage
- Material-Specific Care: Follow manufacturer guidelines for cleaning. While many plastic and glass cups are dishwasher safe, stainless steel often benefits from hand washing to preserve its finish.
- Prevent Fading Markings: If your glass or plastic measuring cups have printed markings, consider hand washing them more often or using a gentle dishwasher cycle to help prevent the markings from fading prematurely.
- Efficient Storage: Nested dry measuring cups are space-efficient. Store liquid measuring cups where they are easily accessible, preferably right-side up to prevent water from collecting if they are still damp.
Beyond the Standard
- When to Use a Scale: For ultimate precision in baking, especially with flour, consider using a kitchen scale. Measuring by weight is generally more accurate than by volume, as ingredients can vary in density.
- Understanding Imperial vs. Metric: Be aware of the measurement system your recipe uses (U.S. customary, Imperial, or Metric) and use appropriate measuring tools to avoid conversion errors.
“The difference between a mediocre dish and an extraordinary one often lies in the precision of its measurements. A well-understood 1/3 cup can be the tiny detail that makes all the difference.” – Chef Antoine Dubois, Culinary Instructor
Conclusion
Mastering the 1/3 cup measurement is a simple yet powerful step towards becoming a more confident and skilled home cook or baker. By understanding the distinction between liquid and dry measuring cups, knowing handy conversion tricks, and selecting tools made from materials best suited for your needs, you equip yourself for culinary success. Embrace accurate techniques and proper care for your measuring cups, and you’ll find that every ingredient, even that humble 1/3 cup, contributes perfectly to your delicious creations.
What culinary challenge will you tackle next with your newfound measuring precision?
Frequently Asked Questions
How many tablespoons are in 1/3 cup?
There are precisely 5 tablespoons and 1 teaspoon in 1/3 cup. This conversion is incredibly useful when you need to measure this amount but only have measuring spoons available.
Can I use a liquid measuring cup for dry ingredients?
While technically possible, it is not recommended for precise measurements. Liquid measuring cups have a spout and extra space for liquids, which makes leveling dry ingredients accurately very difficult and can lead to over or under-measurement.
Why do measuring cup markings fade?
Measurement markings typically fade due to repeated exposure to harsh detergents in dishwashers, scrubbing, or general wear and tear over time. Hand washing with mild soap can help prolong the life of the markings, especially on glass and plastic cups.
What is the most accurate way to measure ingredients?
For the highest accuracy, especially in baking, measuring ingredients by weight using a digital kitchen scale is generally considered superior to volumetric measurements (cups and spoons), as it eliminates inconsistencies due to packing density or ingredient variations.